Welcome to this step-by-step guide on creating a practical and stylish zippered pouch. Perfect for beginners, this project teaches essential sewing skills while producing a versatile bag for everyday use or as a thoughtful gift.
1.1 What Is a Zippered Pouch?
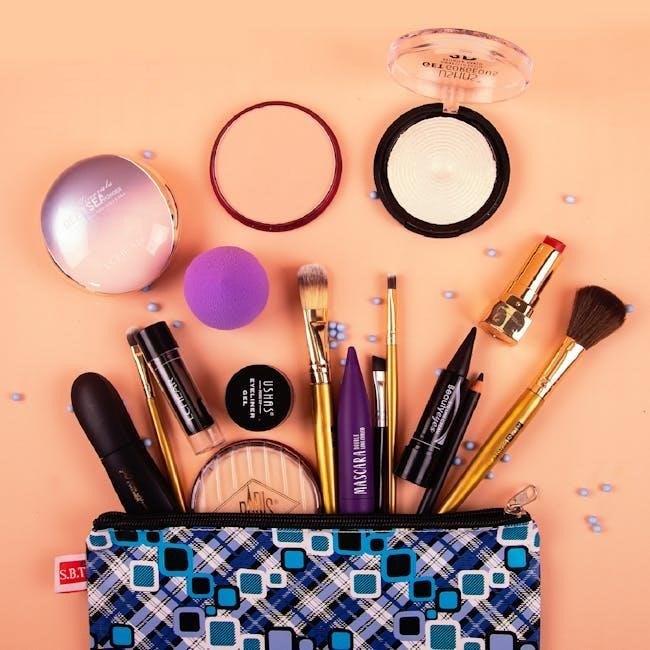
A zippered pouch is a versatile, fabric bag featuring a zipper closure, ideal for storing small items like makeup, pens, or jewelry. It can be customized in size, shape, and material, making it perfect for various uses, from everyday organization to thoughtful gifts. Simple to sew, zippered pouches are a popular DIY project, suitable for all skill levels. They often include features like lined interiors, boxed corners, or decorative elements, enhancing functionality and aesthetics. Whether for practicality or style, zippered pouches offer a creative way to keep belongings tidy and add a personal touch to your daily life.
1.2 Importance of Learning to Make a Zippered Pouch
Learning to make a zippered pouch is a valuable skill for DIY enthusiasts, offering practicality and creativity. It allows you to create personalized, functional items for daily use or gifts. This project enhances sewing skills, teaching techniques like working with zippers and fabric alignment. It’s cost-effective, enabling you to craft custom storage solutions or accessories. Additionally, it fosters creativity, as you can experiment with fabrics, sizes, and designs. Perfect for all skill levels, this project builds confidence and provides a sense of accomplishment. The finished pouch is both functional and stylish, making it a rewarding and useful DIY endeavor.
Materials and Tools Needed
Making a zippered pouch requires fabric, a zipper, stabilizers, and basic sewing tools like a machine, scissors, and pins. Ensure accurate measurements for professional results.
2.1 Fabric Requirements
To make a durable and stylish zippered pouch, choose high-quality fabric. Cotton, canvas, or nylon are ideal for their strength and versatility. For a standard pouch, you’ll need two pieces of fabric: one for the exterior and one for the interior. Ensure the fabric is pre-washed to prevent shrinkage. If using a patterned fabric, consider aligning the design for a polished look. The fabric should be sturdy enough to hold its shape but not too thick to hinder sewing. Measure accurately to avoid waste, and opt for coordinating colors to enhance the pouch’s aesthetic appeal.
2.2 Zippers and Zipper Feet
Selecting the right zipper is crucial for a functional zippered pouch. Choose a zipper that matches your pouch’s size and style, ensuring smooth operation. A zipper foot for your sewing machine is essential for precise stitching. This specialized foot allows you to sew close to the zipper teeth without fabric bunching. Opt for a zipper with a sturdy pull tab for ease of use. Consider the color and finish to complement your fabric. For durability, use a high-quality zipper with metal or nylon teeth. Proper alignment and installation ensure the zipper functions seamlessly, enhancing the pouch’s usability and professional finish.
2.3 Interfacing and Stabilizers
Interfacing and stabilizers add structure to your zippered pouch, preventing the fabric from stretching or distorting. They ensure crisp edges and a professional finish. Choose between fusible interfacing for easy application or sew-in for durability. Apply interfacing to the fabric before cutting to maintain stability. Use a rotary cutter and mat for precise cuts. For smooth application, iron fusible interfacing following the manufacturer’s instructions. Proper use of stabilizers ensures your pouch holds its shape and looks polished. This step is crucial for achieving a professional-looking pouch that lasts.
2.4 Sewing Machine and Basic Sewing Tools
A reliable sewing machine is essential for stitching your zippered pouch. Use a standard sewing machine with a straight stitch or zigzag setting. Essential tools include sharp scissors, a rotary cutter, and a cutting mat for precise fabric cuts. A seam ripper helps correct mistakes, while pins and a tape measure ensure accuracy. Optional tools like a walking foot or zipper foot can improve control when sewing thick fabrics or zippers. Gather these tools beforehand to streamline the sewing process and achieve clean, professional results for your pouch.

Preparation Steps
Preparation involves cutting fabric, applying interfacing, and aligning materials. These steps ensure accuracy and readiness for sewing, making the pouch construction process smooth and efficient.
3.1 Cutting Fabric Pieces
Cutting fabric accurately is essential for a professional finish. Use a rotary cutter and mat for precise cuts. Measure and mark fabric according to your pattern or design. Cut two main pieces for the pouch’s exterior and lining, ensuring they match in size. If using a zipper, cut fabric slightly longer to accommodate the zipper’s length. Consider grain lines to ensure stability and prevent stretching. Double-check measurements before cutting to avoid waste. Smooth, accurate cuts lay the foundation for a well-made pouch, so take your time during this step.
3.2 Interfacing Application
Interfacing adds stability and structure to your pouch. Choose a fusible interfacing that matches your fabric weight. Cut it to the same size as your main fabric pieces. Place the interfacing on the wrong side of the fabric, aligning edges carefully. Use a hot iron with steam to fuse it, pressing firmly but gently. Avoid stretching the fabric while ironing. Let it cool before handling to ensure a strong bond. Proper interfacing application prevents sagging and gives your pouch a professional finish. This step is crucial for durability and maintaining the pouch’s shape over time.

3.3 Layout and Alignment
Proper layout and alignment ensure your pouch comes together seamlessly. Begin by laying your fabric pieces flat on a work surface. Position the zipper centered along the top edge of the front and back pieces, ensuring both sides align perfectly. Use a ruler or measuring tape to verify symmetry. Match seams and edges carefully, especially if your fabric has a pattern. Pin the pieces in place to maintain alignment. Double-check that the pouch lies flat and even before sewing. This step is critical for achieving a professional finish and ensuring the pouch functions correctly. Accuracy now saves time and frustration later.

Sewing the Pouch
Sew the pouch by attaching the zipper, then stitching the sides and bottom. Use a straight stitch for seams and backstitch at beginnings and ends for durability.
4.1 Attaching the Zipper
To attach the zipper, align it centered along the top edge of the fabric pieces, right sides together. Pin securely, ensuring the zipper teeth align with the fabric edge. Sew along both sides of the zipper using a 1/4-inch seam allowance, backstitching at the start and end for strength. Press the seams flat to set the stitching. This step creates a professional-looking zipper installation, ensuring the pouch opens and closes smoothly. Use a zipper foot on your sewing machine for precision and to navigate the bulk of the zipper easily.
4.2 Sewing the Sides and Bottom
With the zipper attached, place the fabric pieces right sides together, aligning the edges carefully. Sew along the sides and bottom using a 1/4-inch seam allowance, backstitching at the beginning and end for durability. Ensure the corners are squared and the seams are pressed flat for a professional finish. Use a walking foot or Teflon foot if needed to glide smoothly over the fabric. This step forms the pouch’s structure, creating a sturdy and even shape. Be precise to avoid puckering or misalignment, ensuring the pouch lies flat when opened.
4.3 Creating Boxed Corners
To achieve sharp, clean corners, mark a 1/4-inch seam allowance at each corner. Fold the fabric to align the edges and sew across the marked point. Trim excess fabric close to the seam for a neat finish. Turn the pouch right side out and press the corners with an iron to shape them. For evenness, use a ruler or guide. This step adds depth and a professional look to the pouch, enhancing its three-dimensional form and aesthetic appeal. Consistency and precision ensure a polished finish.
Adding Optional Features
Enhance functionality and style by adding a strap, lining, or decorative elements like embroidery or appliques. These features personalize the pouch and add visual interest.
5.1 Adding a Strap or Handle
A strap or handle adds functionality and convenience to your zippered pouch. Cut a strip of fabric, ribbon, or webbing to your desired length. Fold raw edges under and sew in place, attaching it securely to the top edge or sides of the pouch. For a more polished look, align the strap with the pouch’s edges before sewing. You can also use a slide or swivel hook for a detachable option. Ensure the strap is reinforced with additional stitching for durability. This feature enhances practicality and style, making the pouch easier to carry and more visually appealing.
5.2 Incorporating a Lining
Incorporating a lining adds a professional finish and protects contents from dust. Cut lining fabric to match the pouch’s outer pieces. Sew the lining separately, then place it inside the outer fabric with right sides together. Sew around the edges, leaving a small opening to turn the pouch right side out. Press seams flat for a crisp finish. Topstitching the edges creates a polished look. For a snug fit, ensure the lining aligns perfectly with the outer fabric. Optionally, use a walking foot for smooth sewing. A lining enhances functionality and aesthetics, making the pouch more durable and visually appealing.
5.3 Adding Decorative Elements
Enhance your zippered pouch with decorative elements like fabric paint, appliques, or embroidery. Fabric paint allows for custom designs but may require heat setting. Appliques offer pre-made shapes for a quick, personalized touch. Embroidery adds intricate details, achievable by hand or machine. Consider buttons or trinkets for visual interest, ensuring they don’t obstruct functionality. Ribbons or tapes can add contrast, while patchwork uses fabric scraps for uniqueness. Quilting patterns can add complexity. Balance and symmetry are key for a polished look. Choose elements that align with the pouch’s purpose and your skill level, ensuring they don’t hinder usability. Plan carefully to avoid overwhelming the design.
Tips and Tricks
Use a walking foot for smooth sewing, backstitch at zipper ends for durability, and press seams as you go for a professional finish.
- Pin carefully to avoid fabric shifting.
- Shorten stitches near zippers for strength.
- Use a seam ripper sparingly to prevent damage.
6.1 Working with Zippers
When working with zippers, choose the correct size and type for your pouch. Align the zipper teeth evenly with the fabric edge, ensuring it’s centered. Use a zipper foot for precise sewing, and backstitch at the start and end for security. Press the zipper seam after sewing to create a crisp fold. For a professional look, tuck the zipper ends under the fabric and topstitch. If using a separating zipper, ensure the stops are securely in place. Trim excess zipper tape carefully to avoid fraying. Always test the zipper before sewing to ensure it glides smoothly.
6.2 Achieving Professional Finishes
Achieving a professional finish for your zippered pouch requires attention to detail. Press all seams thoroughly, especially after attaching the zipper, to create a crisp, flat surface. Topstitch along the edges for a polished look and to reinforce seams. Use a serger or zigzag stitch on raw edges to prevent fraying. Ensure the zipper is evenly aligned and securely sewn. Trim excess thread and tuck seams where visible. For a clean interior, consider adding a lining or finishing seams with binding. A professional finish enhances durability and gives your pouch a high-quality appearance.
6.3 Troubleshooting Common Issues
Common issues when making a zippered pouch include misaligned zippers, uneven seams, or fabric shifting during sewing. To fix a misaligned zipper, repin carefully and sew slowly, ensuring the zipper stays centered. For uneven seams, check your fabric alignment and press seams flat before sewing. If fabric shifts, use a walking foot or Teflon foot to maintain stability. Bulkiness at seams can be resolved by trimming excess fabric and pressing thoroughly. Addressing these issues early ensures a polished final product and prevents frustration during the sewing process.
Variations and Customization
Explore creative variations by experimenting with different shapes, sizes, and fabric types. Add personalized touches like monograms or decorative stitching to make your pouch unique.
7.1 Different Sizes and Shapes
Zippered pouches can be tailored to various sizes and shapes based on their intended use. Small pouches are ideal for makeup or travel essentials, while larger ones can hold laptops or craft supplies. Experiment with unique shapes like circles, hexagons, or asymmetrical designs for a personalized touch. Measure your items to determine the perfect fit, and adjust patterns accordingly. This flexibility allows you to create functional and stylish pouches that cater to specific needs, making each project versatile and practical. Don’t hesitate to think creatively and explore unconventional forms to enhance functionality and visual appeal.

7.2 Using Different Fabrics and Materials
Exploring various fabrics and materials can elevate your zippered pouch’s functionality and style. Cotton fabrics are ideal for everyday use, offering softness and durability. Canvas or denim provides a sturdy, rugged look, perfect for heavier items. Nylon or vinyl materials are great for water-resistant pouches, ideal for travel or outdoor gear. Faux leather or suede adds a sophisticated, professional finish. You can also experiment with quilting fabrics for decorative patterns or specialty materials like thermal or reflective fabrics for unique purposes. This versatility allows you to tailor your pouch to suit specific needs, enhancing both practicality and aesthetic appeal.
7.3 Personalizing the Design
Personalizing your zippered pouch allows you to infuse unique style and functionality. Choose fabrics and colors that match your preferences or intended use. Add embellishments like appliques, embroidery, or patches for a custom look. You can also include personalized labels or monograms for a professional touch. Consider adding interior pockets or compartments for better organization. Adjust the strap length or add decorative zippers to enhance usability. Alignment and symmetry are key for a polished finish. These personal touches make your pouch stand out and cater to specific needs, ensuring it is both functional and visually appealing.

Safety and Maintenance
Regularly clean your zippered pouch with a soft cloth and mild detergent to maintain its appearance. Avoid harsh chemicals or machine washing to preserve fabric integrity.
Store the pouch in a cool, dry place to prevent mold or mildew. Handle zippers gently to avoid damage and ensure smooth functionality over time.
8.1 Caring for Your Zippered Pouch
Spot clean your zippered pouch with a soft cloth and mild soap to remove stains. Avoid machine washing or using harsh chemicals, as they may damage fabrics or zippers. For tougher stains, gently scrub with a damp cloth before air-drying. Store the pouch in a cool, dry place to prevent mold or mildew. Avoid overstuffing, as this can stretch the fabric or strain the zipper. For long-term storage, keep it partially zipped to maintain shape. Regularly inspect seams and zippers for wear and tear to ensure durability.
8.2 Tips for Longevity
To ensure your zippered pouch lasts, use high-quality materials and handle it with care. Reinforce seams during sewing for added durability. Avoid overstuffing, as this can strain the zipper and fabric. Store the pouch in a dry environment to prevent moisture damage. Use a fabric protector to repel spills and stains. Regularly inspect and clean the zipper to keep it functioning smoothly. For added protection, consider adding a lining. Avoid exposing the pouch to direct sunlight or extreme temperatures, as this can fade colors or weaken fabric. With proper care, your zippered pouch will remain functional and stylish for years.
Congratulations! You’ve successfully created a functional and stylish zippered pouch. This project not only enhances your sewing skills but also provides a practical, everyday accessory. By following the steps and tips, you’ve gained confidence in working with zippers, fabric, and customizable designs. Whether for personal use or as a gift, your handmade pouch is a testament to your creativity. Happy sewing, and enjoy experimenting with new designs and materials!
9.1 Final Thoughts
Completing a zippered pouch is a rewarding experience that combines creativity with practical skills. This project is perfect for sewists of all levels, offering a sense of accomplishment and versatility. Whether you use your pouch for daily essentials, gifts, or organization, it’s a thoughtful and functional item. Remember, sewing is a journey of learning and experimentation. Don’t hesitate to explore different fabrics, sizes, and designs to make each pouch unique. With practice, you’ll master techniques like working with zippers and achieving professional finishes. Keep sewing, and enjoy the satisfaction of creating something truly personalized and meaningful.
9.2 Encouragement to Try the Project
Embarking on a zippered pouch project is an exciting way to express your creativity and develop sewing skills. Whether you’re a beginner or an experienced sewist, this project offers a fun and achievable challenge. The process is rewarding, and the end result is a practical, personalized item you’ll use and cherish. Don’t be afraid to experiment with fabrics, colors, and designs—each pouch can tell a unique story. Take the leap, enjoy the creative journey, and celebrate the joy of making something with your own hands. Your finished pouch will be a testament to your creativity and effort.